
AHHH! I’ve wanted to post this DIY guide since I first started my blog. I first got into leather mask making back in 2012 after finding a tutorial by an amazing artist Merimask. If you want to learn more about mask making or watch a great video tutorial, check out her website. So, now I present to you:
How to Make your own Leather Mask
What you Need:
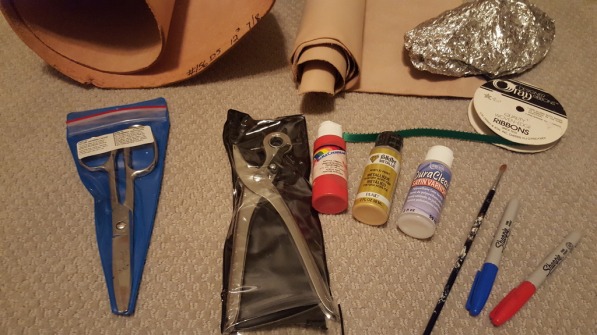
- Vegetable tanned leather (7-8oz for a heavy decorative mask or 4-6oz for a lighter easier to wear mask)
- Leather shears (or other heavy duty shears)
- Craft knife
- Heavy duty leather punch (or a hammer and nail)
- Cardboard or sturdy paper (to draw out your design)
- Pen or pencil
- Regular scissors
- Oven and running water
- Aluminum foil
- Paint brushes
- Acrylic paint of leather dye
- Satin or semi-gloss varnish
- Crayola Model Magic (or other light-weight clay)
- Ribbon or leather straps
- Permanent markers or oil paint pens
- Feathers, chains, sequins, or other decorative items
- Glue
Where to Begin?
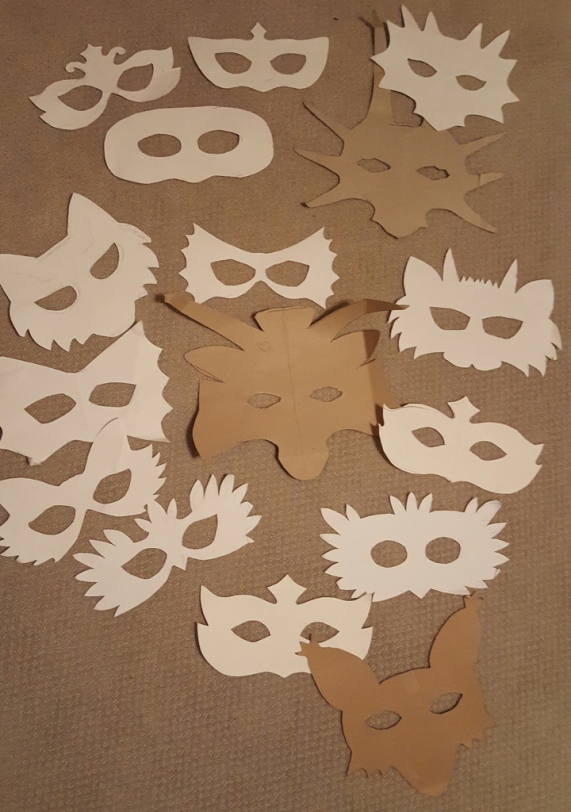
- Plan out your mask pattern! Do you want to be a dragon? How about an owl or a cat? You can place a sheet of paper over your face and gently trace your eyes for correct placement. Cut out your pattern and try it on before translating it to your leather. Sometimes it helps to fold the paper in half if you want both sides of the mask to be identical.
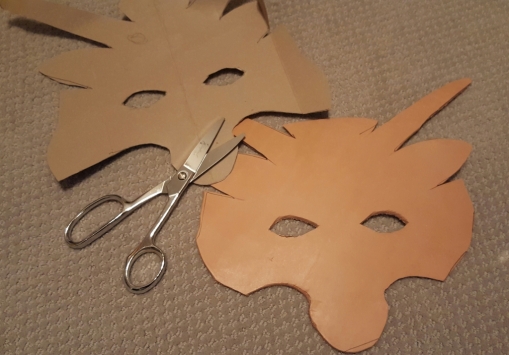
- Lay your leather flat on a wide work space and trace pattern on with a pen or pencil. It’s very important that you use vegetable tanned leather (cus who wants stinky disgusting chemicals on their face?) Hides can be purchased online and from some craft shops (I’ve even found it at Renaissance Fairs)
- Cut the pattern out using the shears. Depending on the thickness of the leather, this can be a difficult and tedious job, so very sharp leather shears are preferred.
- Use a craft knife to cut out the holes for the eyes (make them extra big since they tend to shrink slightly when baking). If you are planning to add ribbons or ties so you can wear your mask, now would be the time to cut or punch the holes. Make sure any holes are at least a half-inch from the edge of the mask to prevent tearing.
Now for the Interesting Part- Shaping your Mask!
- Preheat your oven to about 200 degrees Fahrenheit. If you’re feeling nervous, you can use lower temperatures for thinner masks (170 degrees) or you can turned it up a bit for thicker 8 oz leather to speed up the drying process (up to 240 degrees).
- Wet your mask with warm water. The leather is ready for the next step when the rough back side no longer releases bubbles. Set the wet leather aside on a towel to sop up extra moisture.
- The first step to shaping is making the bend at the bridge of the nose. Put the wet mask on your face and pinch between the eye holes, forming the mask to the bridge of your nose and your brow ridge. The mask will be floppy at this point and won’t hold it’s shape very well, but don’t worry.
- Place your floppy mask in the oven and bake for several minutes (anywhere from 3-6 minutes depending on the leather). Remove the mask from the oven and let cool for a minute.
- Put the warm mask back on your face, reshaping the bridge of the nose until it fits right. Now that the leather is warm, the mask will be much more malleable and will hold it’s shape better. If you created a mask with horns, you can twirl the horns around a marker to give them a curly-cue look. For ears or fur, curl or fold the leather to until you are happy with the results.
- Put the mask back in the oven and repeat these steps until the leather begins to lighten and become stiffer. Baking is complete when the mask is rigid and uniform in color (usually takes about 5-7 rounds of baking and reshaping). During the process, sometimes it helps to use balled up aluminum foil to prop up brows, snouts, horns, ears, etc…

Time to Decorate!
- There are some many amazing ways to decorate your mask, so be creative! I like to use Crayola Model Magic for adding noses and brows since it is very light weight and dries fast. Feathers, metal gears and gadgets, chains, fake fur, decorative paper, ribbons… Go crazy!
- Paint a base coat color in acrylic or dab on leather dye and allow to dry. Details can be added using additional paint or permanent markers. Seal everything with varnish or other craft sealant. It is usually best to leave the inside of the mask unpainted since paints and dyes can color the skin, though some artists still prefer to varnish the inside of the mask to protect it from dirt and oils.
- Add ribbons using your pre-punched holes. Other details like feathers can be glued to the surface of the mask using craft glue or superglue.
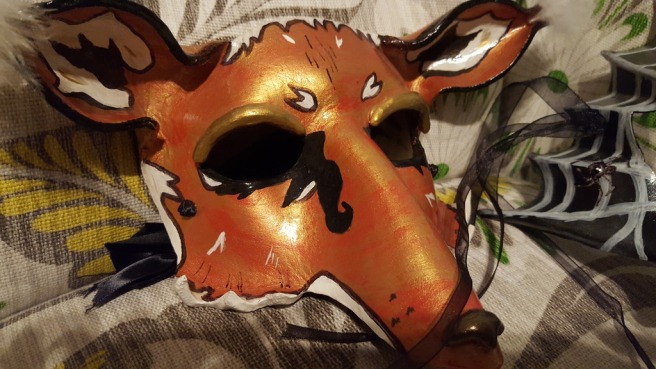
- And ta da! You have a finished mask!


Admitting not having read the whole thing, I like the fact that it’s there:) Could come in handy some day.
LikeLiked by 1 person
Haha thanks! If you ever give mask making a try, you can always let me know if you have any questions 🙂
LikeLiked by 1 person